If you’re using Quill Forms and want to leverage Facebook ads to track user interactions, you can integrate Facebook Pixel to gain insights into how many people view, open, and submit your Quill Forms from Facebook sources. Follow these simple steps to add Facebook Pixel tracking to your Quill Forms:
You should have a Facebook Business account with Pixel set up (here’s how to set up Facebook Pixel)
Let’s get started:
Step 1: Find your Pixel ID in Facebook
- Open your Facebook Business account and click the hamburger menu icon, then select Events Manager.
- In the Events Manager interface, you’ll see your pixels named, along with their corresponding ID numbers.
- Copy the Pixel ID number as we’ll need it to add the pixel to your Quill Form.
Step 2: Connect Facebook Pixel to your Quill Form
- Open settings from Quill Forms dashboard then click on Analytics then click on Facebook Pixel and add your pixel id
- Save the changes. Your Facebook Pixel is now successfully set up!
Once you’ve completed the integration, you can now track user interactions and gather valuable insights to optimize your Facebook ads strategy.
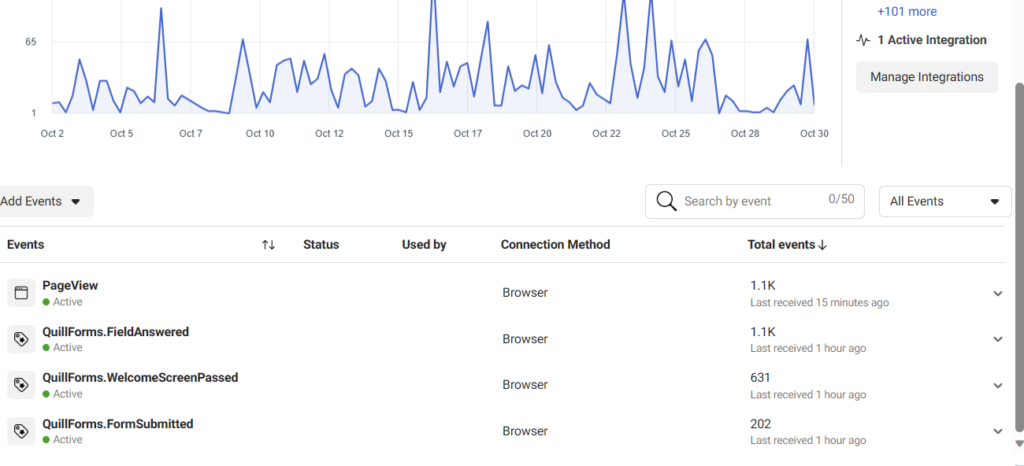
Sent Events via Quill Forms
1- QuillForms.FormSubmitted
This event is sent after the form submission with label of “Form Submitted”
2- QuillForms.FieldAnswered
This event is sent after the field answer with the field label
3- QuillForms.WelcomeScreenPassed
This event is sent after passing the welcome screen with label of “Welcome Screen Passed”
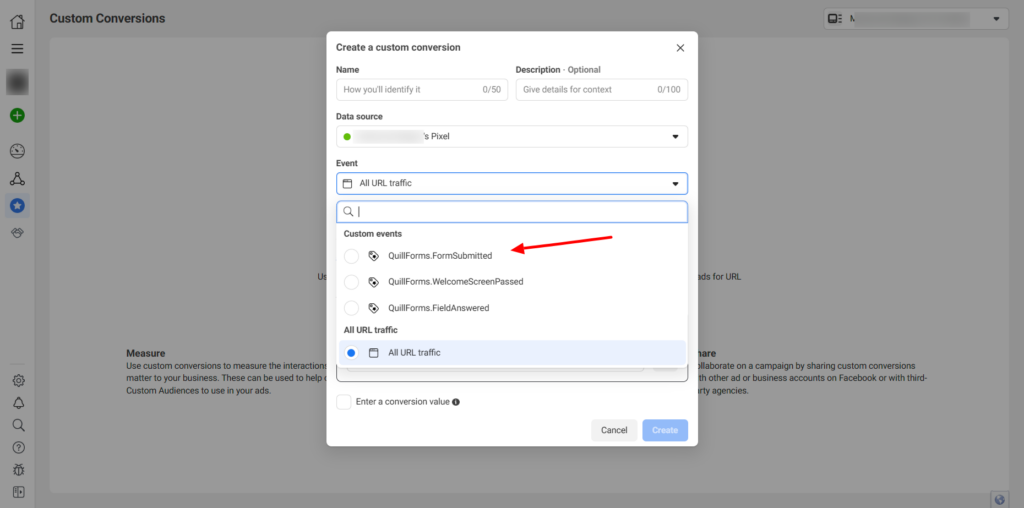
Create a custom conversion based on Quill Forms events
To create custom conversion based on Quill Forms events, click on custom conversions and click on create a custom conversion then in Event Dropdown, choose any of Quill Forms events. Usually, you will use this event: QuillForms.FormSubmitted