Intro
Are you seeking a seamless way to collect and organize form submissions for your projects and collaborations? Look no further than the QuillForms Airtable addon. QuillForms is a user-friendly form builder plugin for WordPress that simplifies the creation of custom forms. With the Airtable addon, you can effortlessly integrate QuillForms with Airtable, a powerful collaboration and database tool. By combining the versatility of QuillForms with the organizational power of Airtable, you can efficiently capture and centralize form submissions, making it easier than ever to manage and analyze your data. In this guide, we’ll walk you through the setup process of the QuillForms Airtable addon and demonstrate how this integration can enhance your project workflows and data management.
How to setup
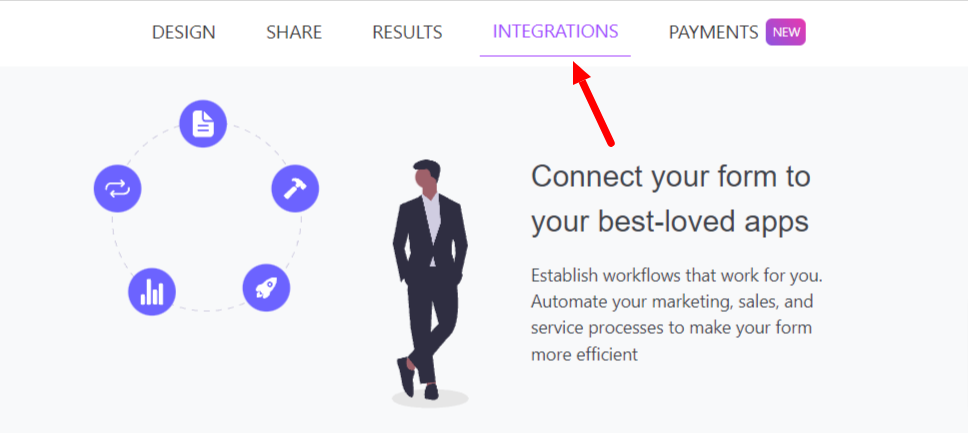
1. Go to the form you want to connect with Airtable and click Integrations Tab.
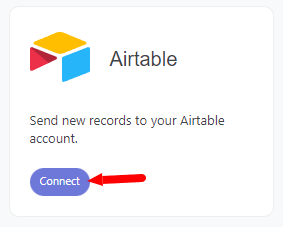
2. Click the “Connect” button.
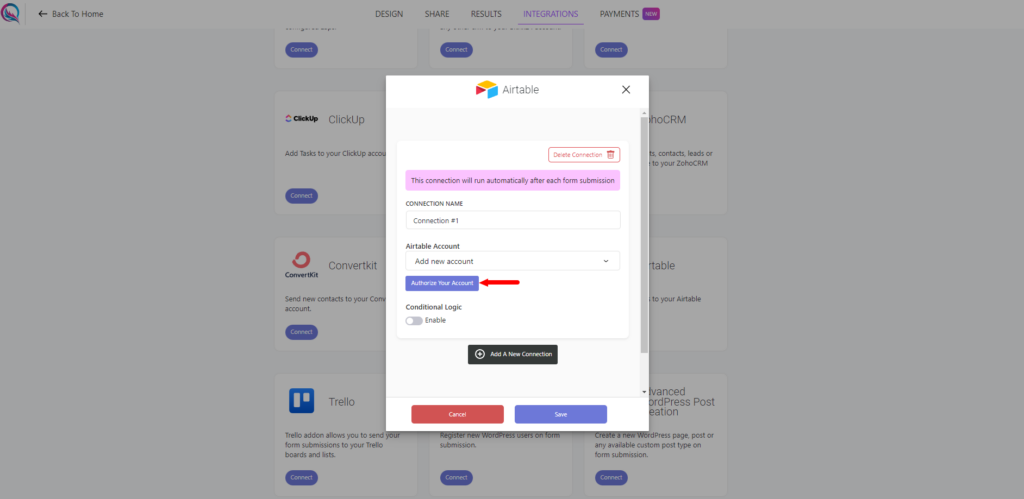
3. For the first time, you need to connect your Airtable account with Quill Forms.
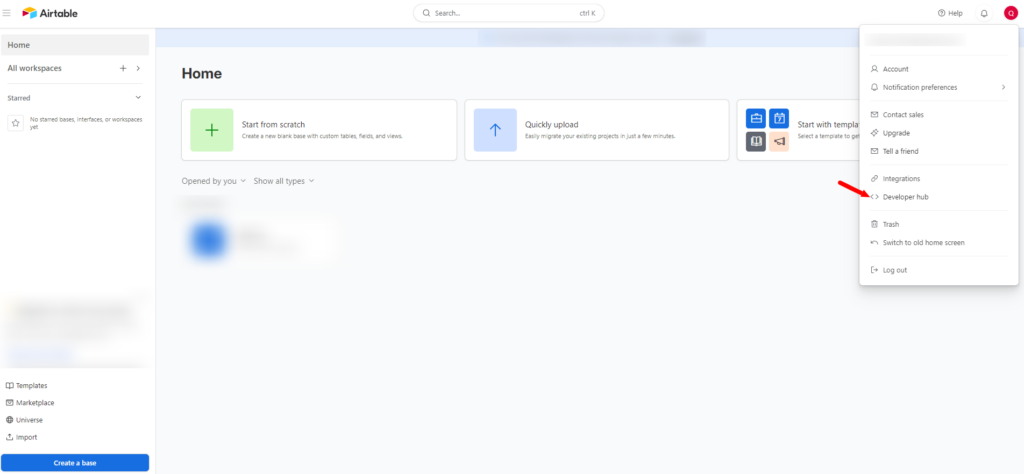
- Login to your Airtable account, Click on the user icon in the top right corner and select ‘Developer hub’ from the dropdown menu.
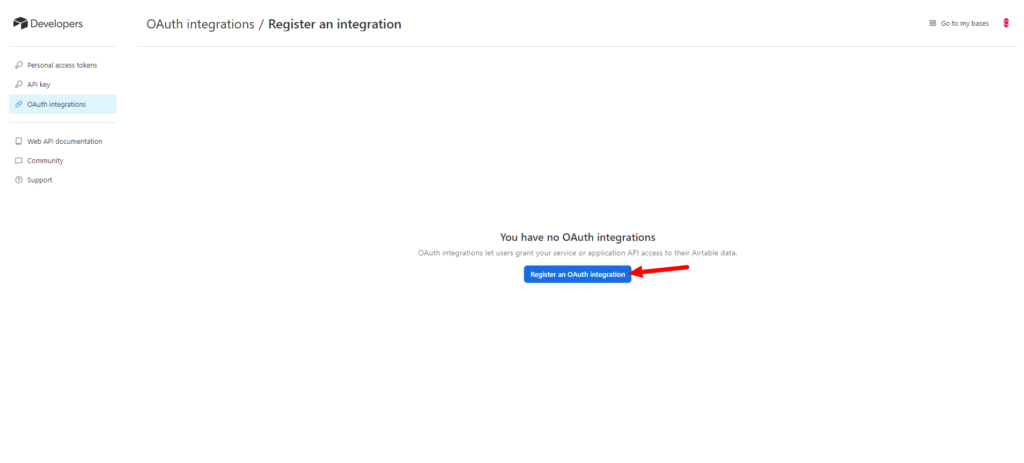
- Click on the “OAuth integrations” from the left sidebar.
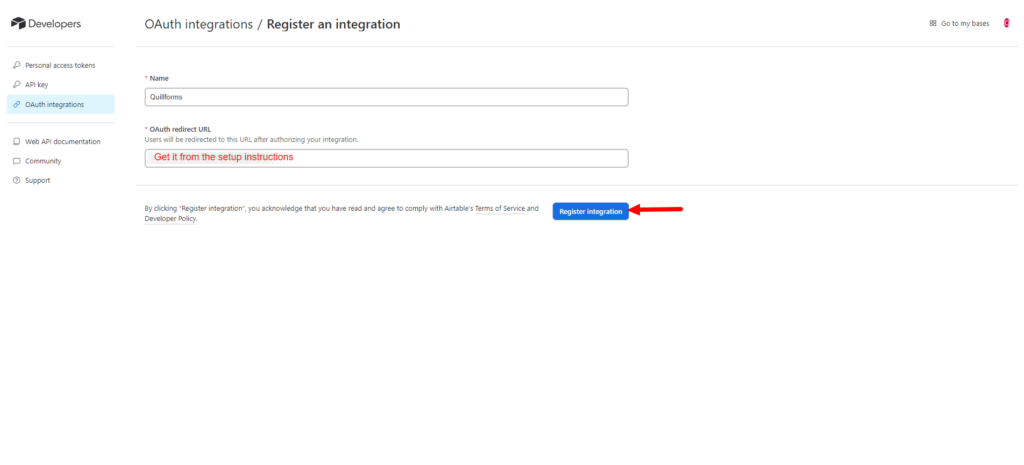
- Click on the “Register an OAuth integration” button.
- Fill app fields as below.
- Click the “Register integration” button.
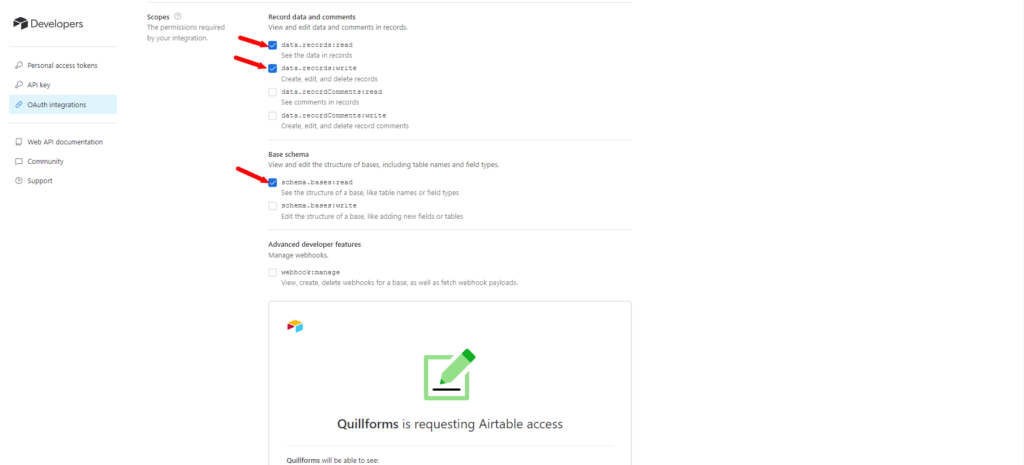
- Scroll down to the scopes section.
- Select
- data.records:read
- data.records:write
- schema.bases:read
- Click on the “Save changes” button.
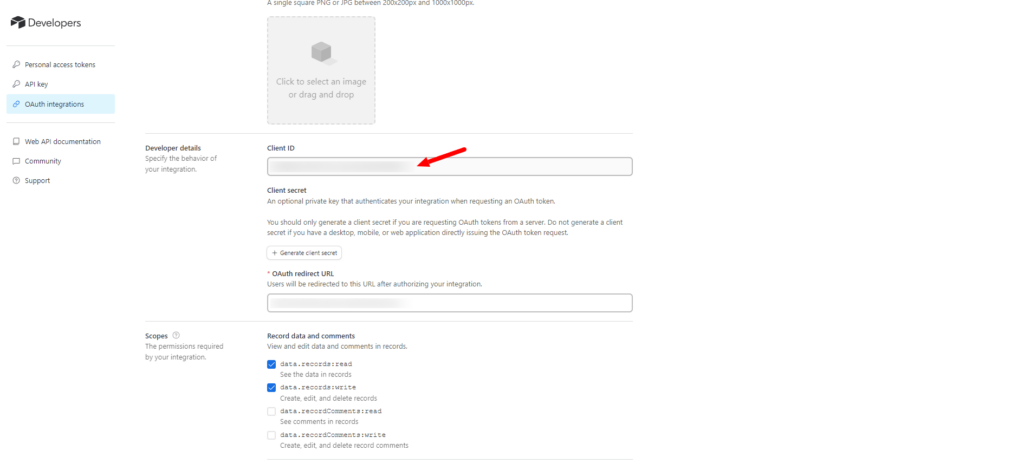
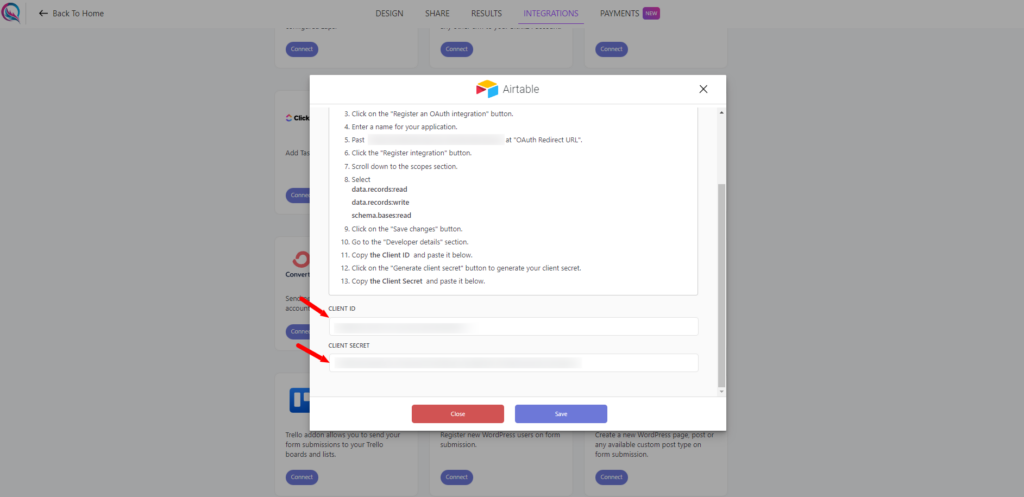
- Go to the “Developer details” section.
- Copy the Client ID and paste it into the instructions screen.
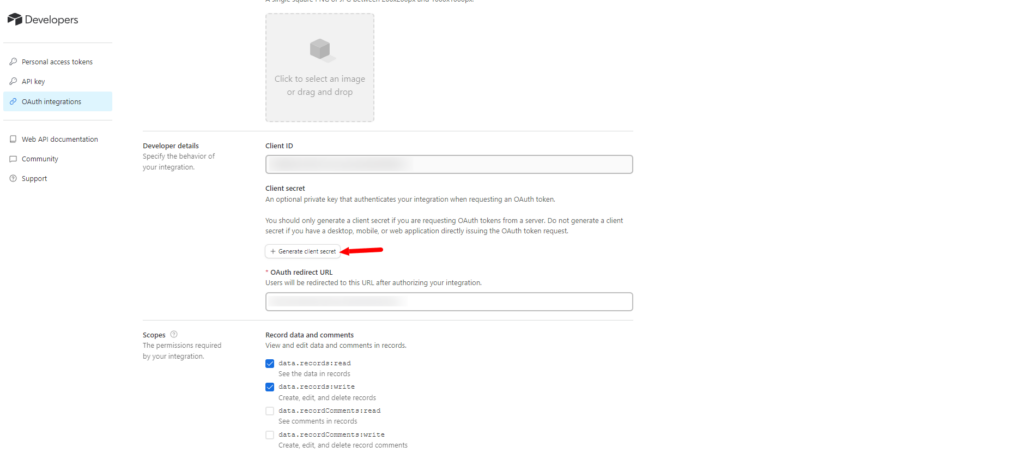
- Click on the “Generate client secret” button to generate your client secret.
- Copy the Client Secret and paste it into the instructions screen.
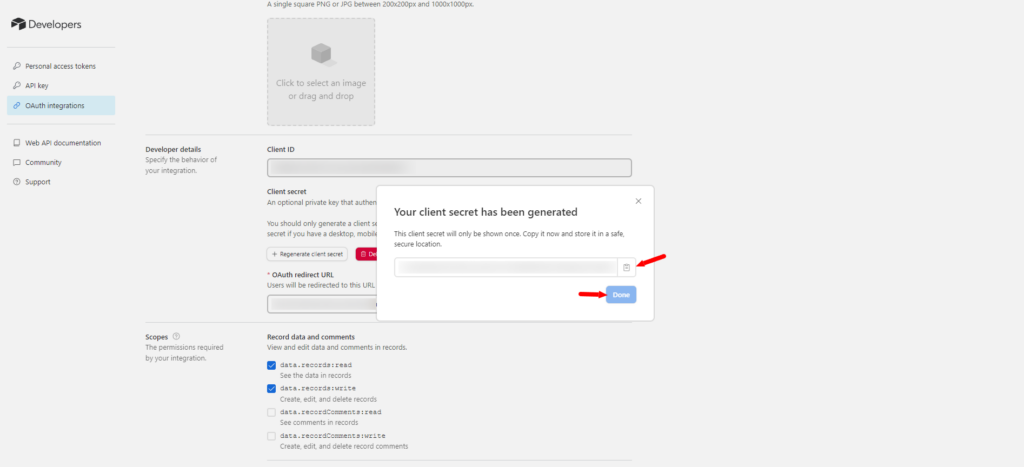
- Click the “Save” button then click the “Authorize” button.
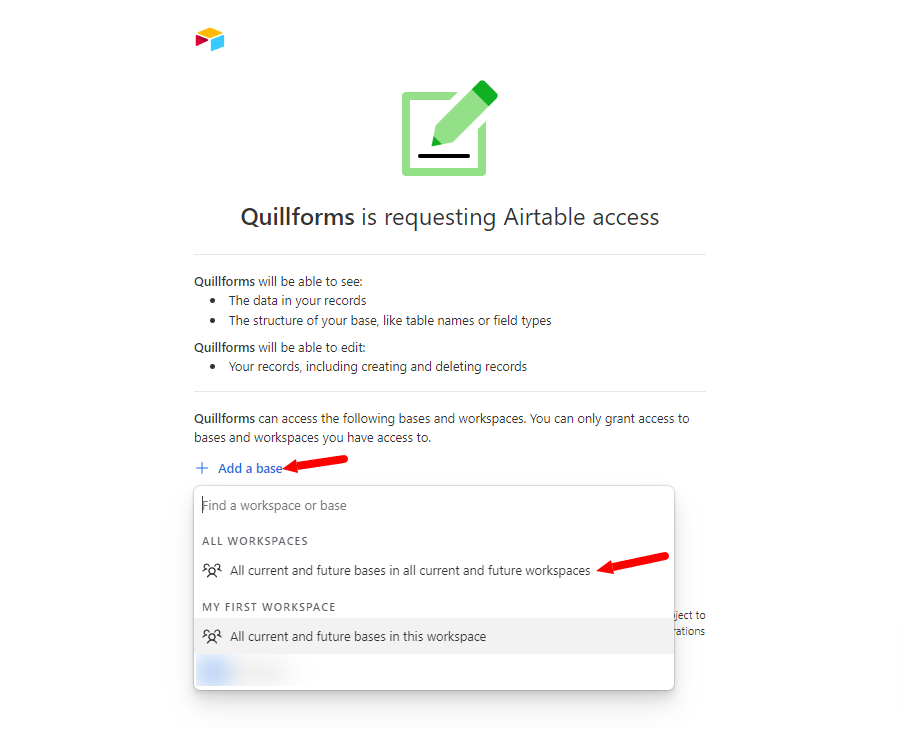
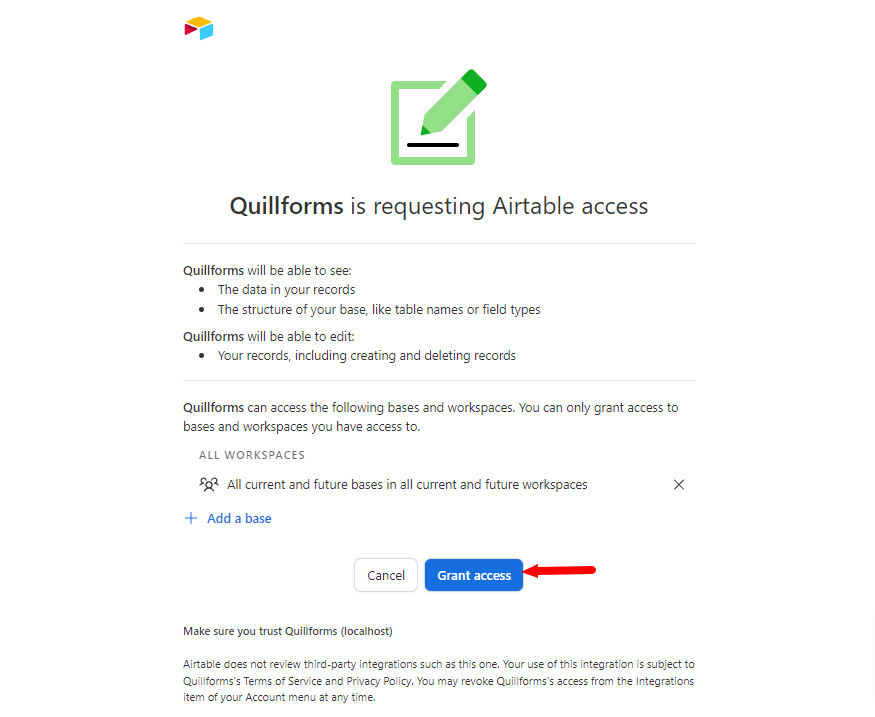
- Click the “add a base” button and select “All current and future bases in all current and future workspaces”.
- Click the “Grant access” button.
4. Select the base, table, and Map Airtable fields.
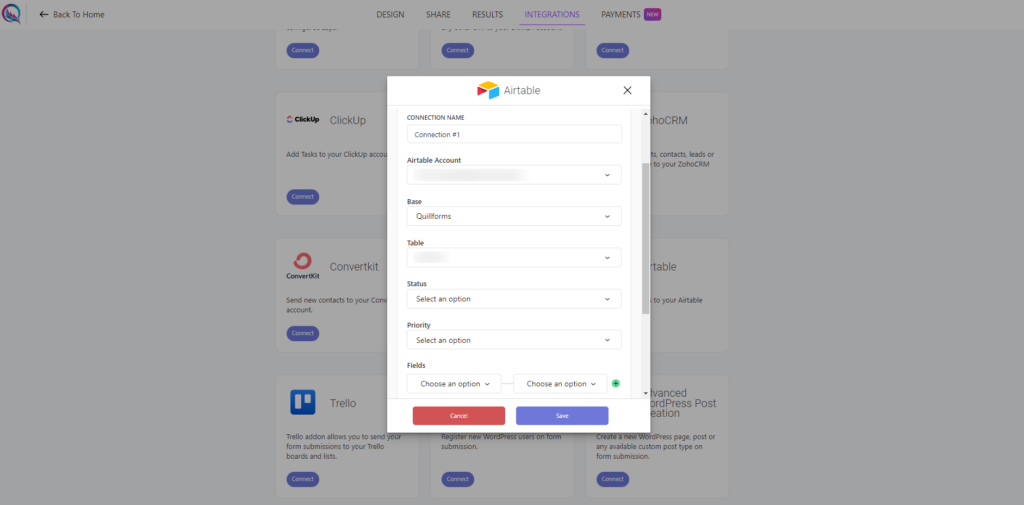
5. Enable “Conditional Logic” if you like to run this connection under certain conditions only.
6. Click the “Save” button.
7. Now you’re all set! All your new form submissions will be processed with this connection. You can also run this connection manually for already submitted entries by clicking the “Run Connection” Button! You can also add additional connections with different Airtable accounts, settings, or conditional logic.
Conclusion
The QuillForms Airtable addon provides a seamless solution for collecting and organizing form submissions, elevating your project workflows and data management. By integrating QuillForms with Airtable, you can effortlessly centralize and analyze your form data, eliminating the hassle of scattered responses. Say goodbye to manual data entry and hello to a streamlined and organized approach. With the QuillForms Airtable addon, you have the power to efficiently manage your form submissions, collaborate effectively, and make informed decisions based on your data. Take control of your data management process today and experience the ease and efficiency of this powerful integration. Start maximizing your productivity and gain valuable insights with QuillForms and Airtable.


