Complete Setup Guide
Email notifications are a powerful feature in Quill Forms that allow you to send automated emails to administrators, form submitters, or other recipients when a form is submitted. This guide will walk you through the process of setting up and managing email notifications in your Quill Forms.
Understanding Email Notifications
Email notifications in Quill Forms serve multiple purposes:
- Admin Notifications: Alert administrators when a form is submitted
- Submitter Confirmations: Send confirmation emails to users who submit the form
- Custom Recipient Notifications: Send form data to specific stakeholders
You can create multiple notifications with different recipients, content, and conditions for each form.
Accessing the Email Notifications Panel
To access the Email Notifications panel:
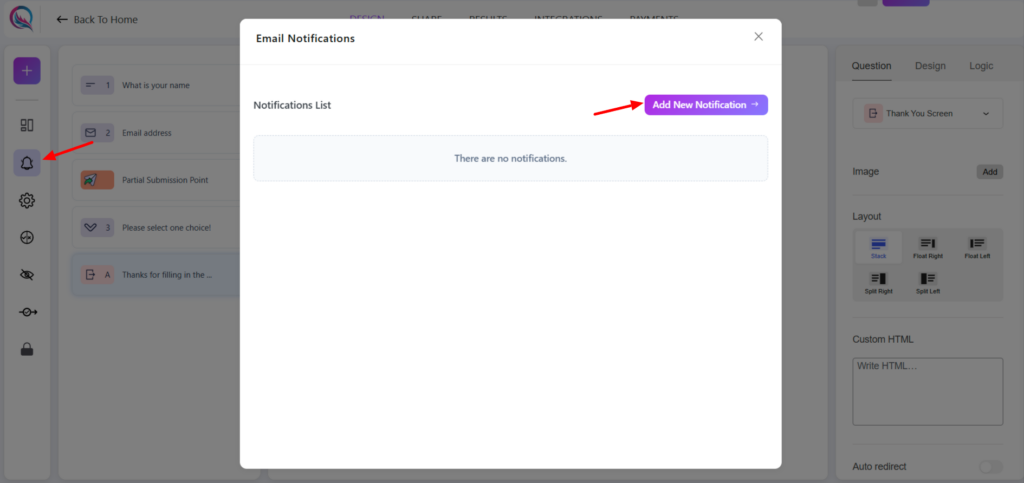
- Open your form in the Quill Forms editor
- Locate and click on the “Email Notifications” icon option in the builder panel
- This will open the Email Notifications panel where you can manage all notification settings
Setting Up a New Email Notification
To create a new email notification:
- In the Email Notifications panel, click the “Add New Notification” button
- You will see the notification editor with several configuration options
- Start by giving your notification a descriptive title in the “Title” field
- By default, notifications are set to “Active” (toggle enabled)
Configuring Recipients
You can configure who receives the notification in two ways:
Option 1: Send to Specific Emails
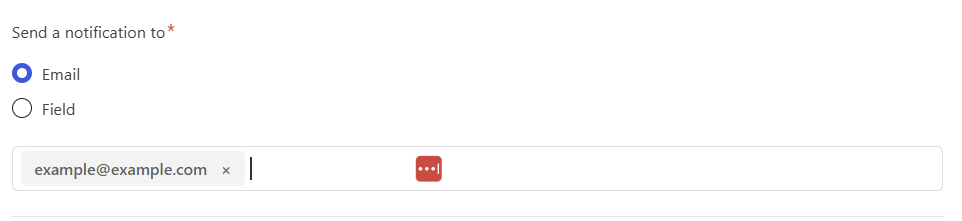
- Select the “Email” radio button under “Send a notification to”
- Type email addresses in the field below
- Multiple email addresses can be added by typing an email and then hitting space
- Each email will appear as a tag in the input field
Option 2: Send to an Email from a Form Field
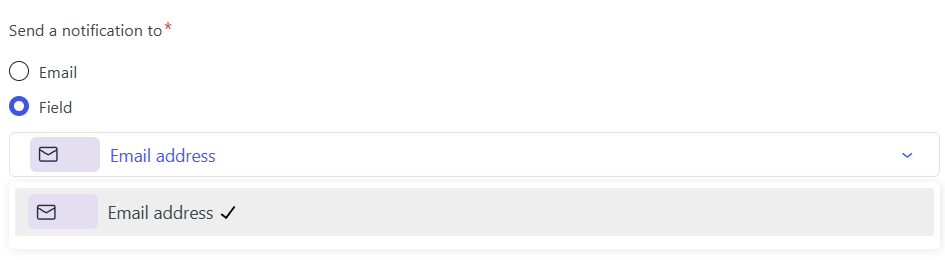
- Select the “Field” radio button
- Choose an email field from your form from the dropdown that appears
- This will send the notification to the email address that the submitter entered in that field
Setting Up Reply-To Options
The “Reply-To” setting is often misunderstood but is a crucial part of your email notification setup. Here’s what it does:
When someone receives your notification email and clicks “Reply” in their email client, the “Reply-To” address determines where their response will be sent. Without a proper Reply-To address, responses might go to a no-reply address or get lost.
What is the Reply-To Address For?
- It sets the destination for email replies when recipients click “Reply”
- It does NOT affect who receives the original notification
- It’s especially useful for creating two-way communication channels
Option 1: Specific Email Address
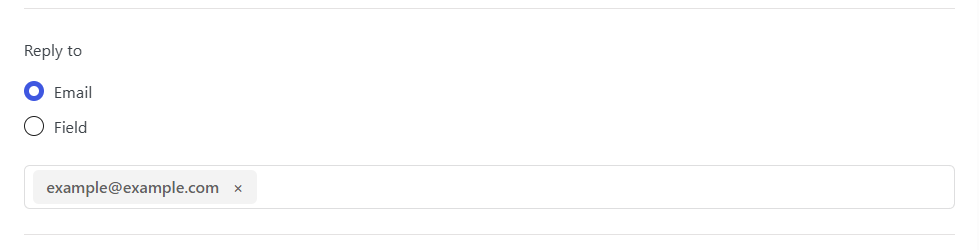
- Select the “Email” radio button under “Reply to”
- Enter the email address you want recipients to reply to
Option 2: Use an Email from a Form Field
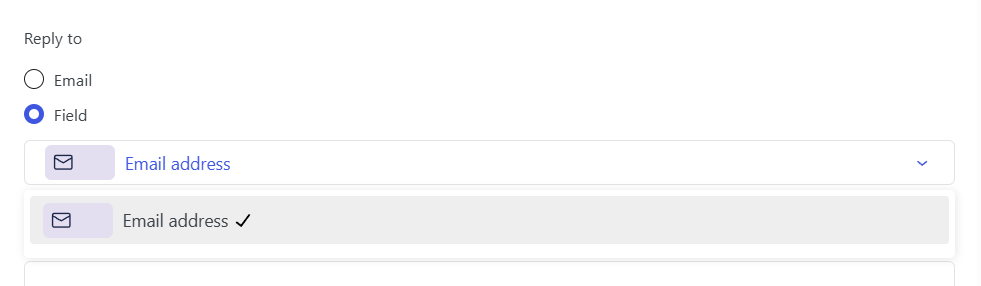
- Select the “Field” radio button
- Choose an email field from your form from the dropdown
- This is useful when you want replies to go directly to the form submitter
Creating Email Content
Each notification requires two essential content components:
Subject Line
- Enter a clear, descriptive subject line in the “Subject” field
- This field is required
Message Body
- Use the rich text editor to compose your email message
- The editor provides formatting options including:
- Basic text formatting (bold, italic, underline)
- Paragraph styles
- Lists and alignments
- Insert links
- Insert tables
- Add emojis
Using Form Data in Your Email
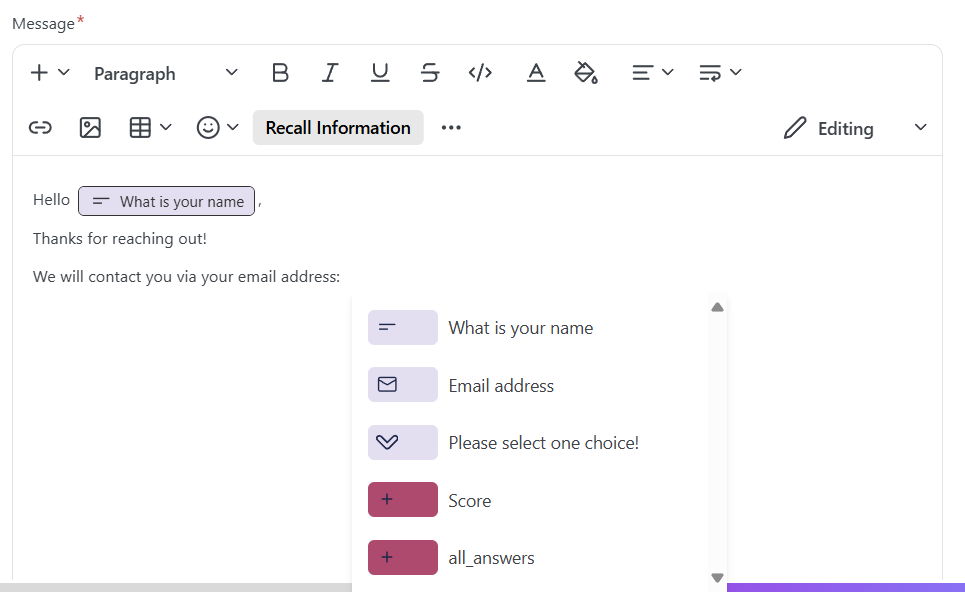
You can dynamically include form submission data in your emails:
- Place your cursor where you want to insert a form field value
- Click the “Recall Information” button in the editor toolbar
- Select the form field whose value you want to include
You can also use the special merge tag {{form:all_answers}} to include all form answers in a formatted list.
Using Conditional Logic
You can set up conditions that determine when a notification is sent:
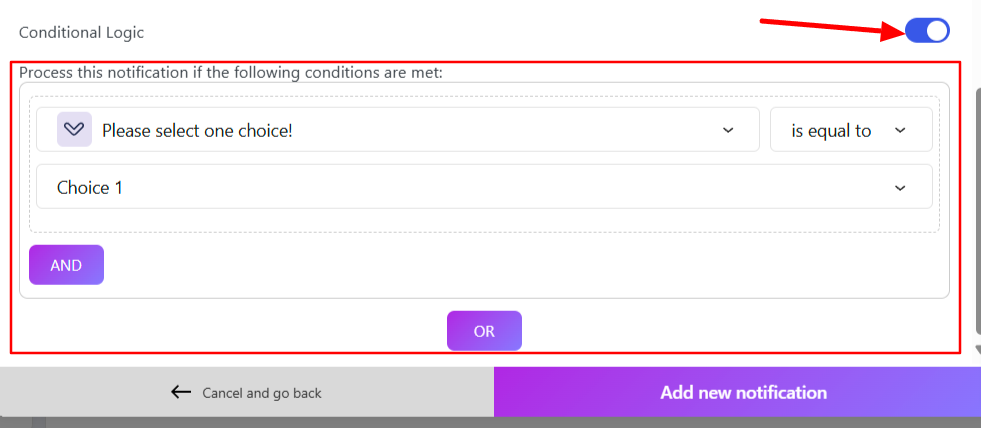
- Enable the “Conditional Logic” toggle
- Set up rules based on form field values
- The notification will only be sent when the conditions are met
This is useful for sending different notifications based on user responses.
Managing Multiple Notifications
You can create multiple notifications for each form:
- After setting up your first notification, return to the notification list
- Click “Add New Notification” to create additional notifications
- Each notification can have different recipients, content, and conditions
- All notifications are listed in the “Notifications List” section
To edit an existing notification:
- Click on the notification in the list
- Make your changes
- Save the notification
To delete a notification:
- Select the notification in the list
- Click the delete button
- Confirm the deletion
Best Practices
- Use clear titles: Give each notification a descriptive title that indicates its purpose
- Personalize content: Use merge tags to include the submitter’s name and relevant form data
- Test thoroughly: Send test submissions to ensure notifications work as expected
- Keep it relevant: Only include information that recipients need to see
- Use conditional logic: Avoid sending unnecessary notifications by using conditions
Troubleshooting
If your email notifications aren’t working as expected:
- Check recipient emails: Ensure all email addresses are entered correctly
- Verify form fields: Make sure any referenced form fields exist and collect the expected data
- Check spam folders: Ask recipients to check their spam or junk folders
- Review conditional logic: Ensure your conditions aren’t unintentionally preventing notifications
- Test with multiple browsers: Some configuration issues may be browser-specific
By following this guide, you should be able to set up and manage email notifications in Quill Forms effectively. For additional assistance, please contact Quill Forms support.


