Intro
Are you looking to simplify your lead generation process and enhance your email marketing campaigns? The QuillForms ConvertKit addon is here to help! QuillForms is a user-friendly form builder plugin for WordPress that allows you to create custom forms with ease. With the ConvertKit addon, you can seamlessly integrate QuillForms with ConvertKit, an email marketing platform designed to help creators and entrepreneurs grow their online businesses. By integrating QuillForms with ConvertKit, you can automatically add form submissions to your ConvertKit account, ensuring that you never miss an opportunity to connect with your audience. In this guide, we’ll walk you through the process of setting up the QuillForms ConvertKit addon and getting started with using it to boost your email marketing efforts.
How to setup
1. Go to the form you want to connect with Convertkit and click Integrations Tab.

2. Click the “Connect” button.
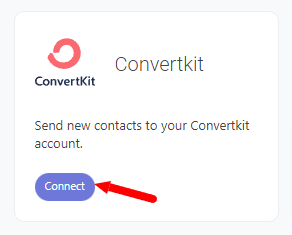
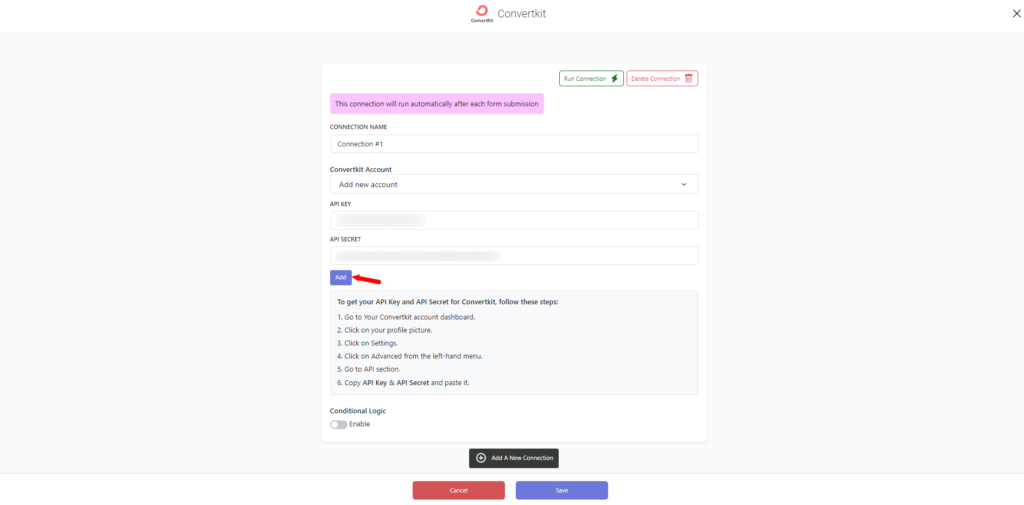
3. For the first time, you need to connect your Convertkit account with Quill Forms.
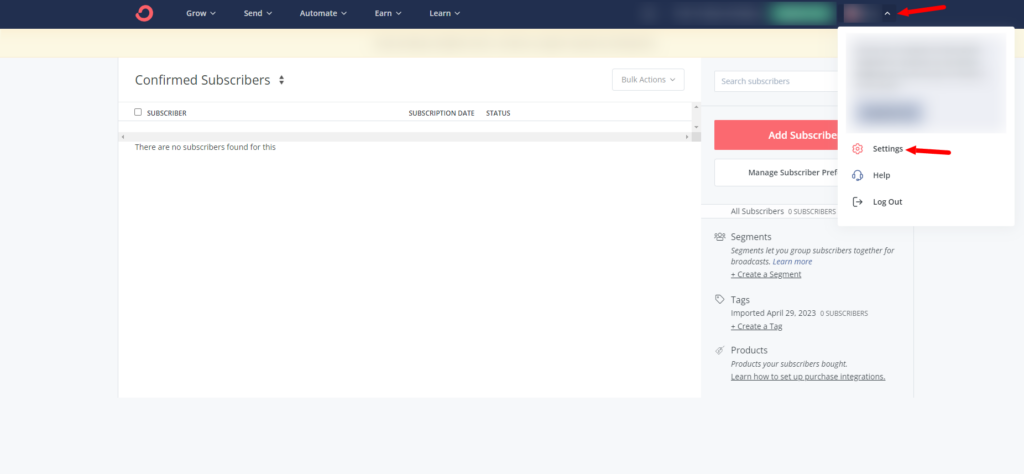
- Go to Your Convertkit account dashboard.
- Click on your profile picture.
- Click on Settings.
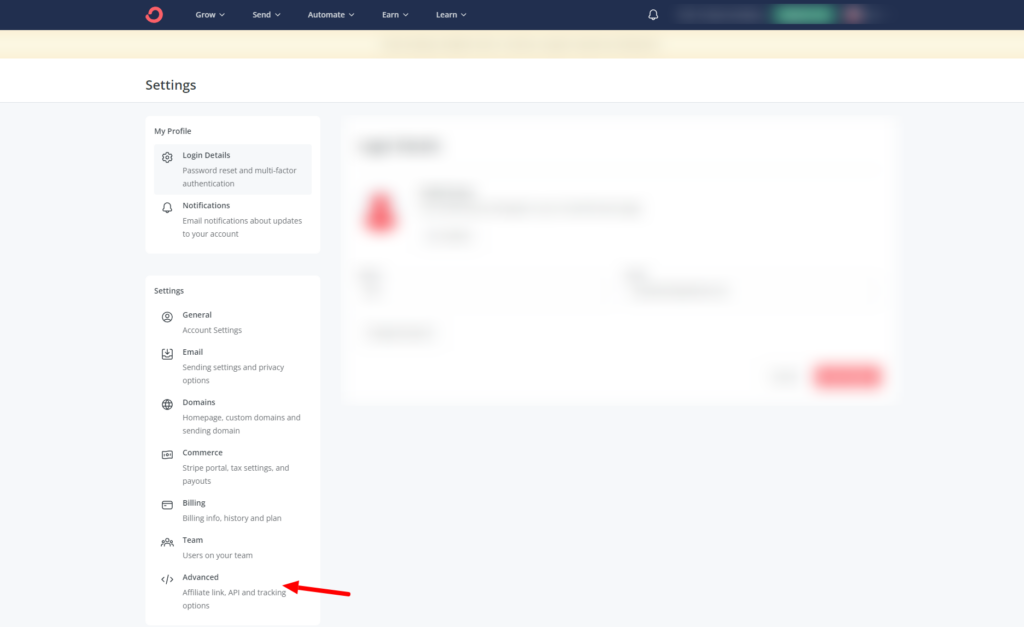
- Click on Advanced from the left-hand menu.
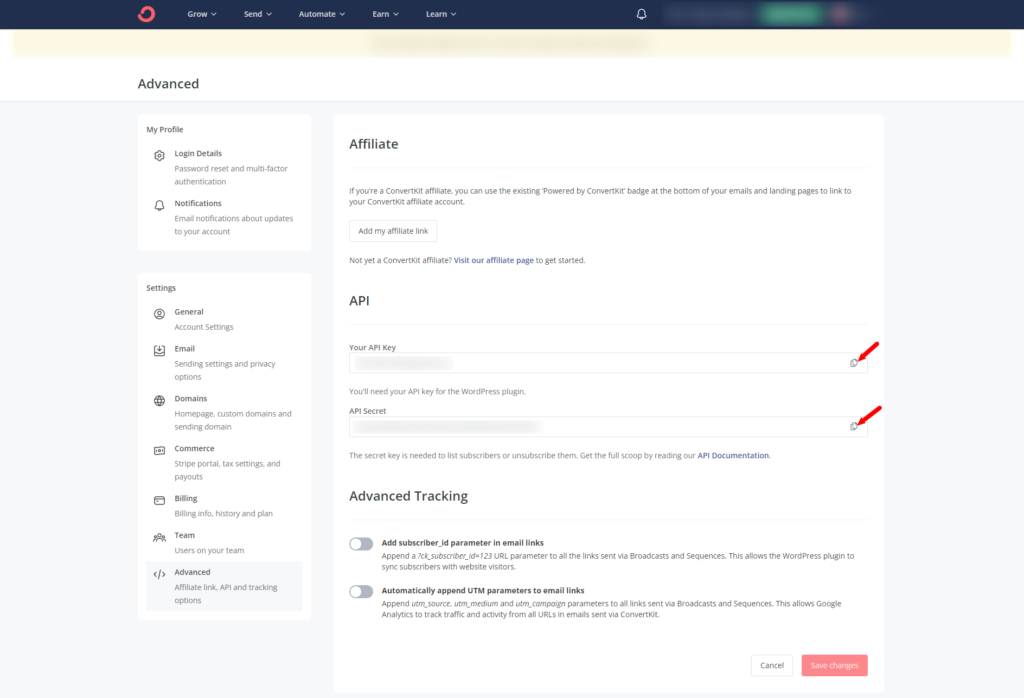
- Go to the API section.
- Copy API Key & API Secret and paste it.
4. Select the form, and Map Convertkit fields.
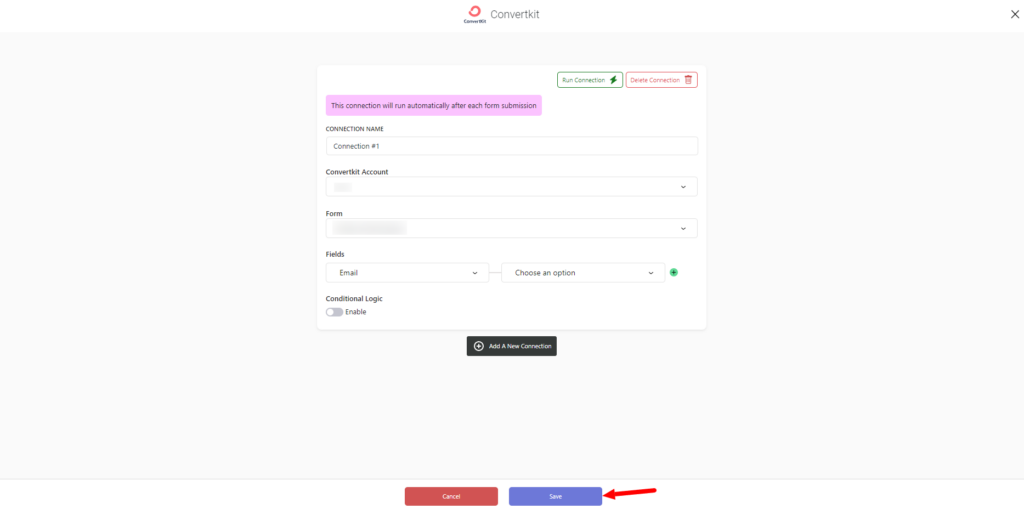
5. Enable “Conditional Logic” if you like to run this connection under certain conditions only.
6. Click the “Save” button.
7. Now you’re all set! All your new form submissions will be processed with this connection. You can also run this connection manually for already submitted entries by clicking the “Run Connection” Button! You can also add additional connections with different Convertkit accounts, settings, or conditional logic.
Conclusion
Integrating the QuillForms ConvertKit addon with your WordPress website can significantly enhance your lead generation and email marketing efforts. By automating the process of adding form submissions to your ConvertKit account, you can save time and focus on what matters most – connecting with your audience and growing your business. With the step-by-step guide we’ve provided, setting up the integration is easy and straightforward.


