intro
Ready to automate your workflows and connect your forms to thousands of apps? Introducing the QuillForms Zapier Add-on—a powerful integration that brings smart automation and endless flexibility to your WordPress forms. QuillForms is a modern, interactive form builder for WordPress, designed to make data collection easy and engaging. Zapier, the leading automation platform, allows you to connect QuillForms with over 6,000 apps like Google Sheets, Mailchimp, Slack, Notion, and more—no coding required.
With the QuillForms Zapier addon, every form submission becomes a trigger for action—from adding a new contact to your CRM, sending follow-up emails, posting to your team’s chat, or updating project management tools. It’s perfect for automating lead capture, onboarding processes, task creation, marketing workflows, and much more.
By combining the flexibility of QuillForms with the power of Zapier, you can eliminate repetitive tasks, reduce manual errors, and build a smarter, more connected workflow—all from your WordPress site.
In this guide, we’ll walk you through the steps to set up the QuillForms Zapier addon and show you how to use it to streamline operations, improve response times, and increase overall productivity.
How to setup
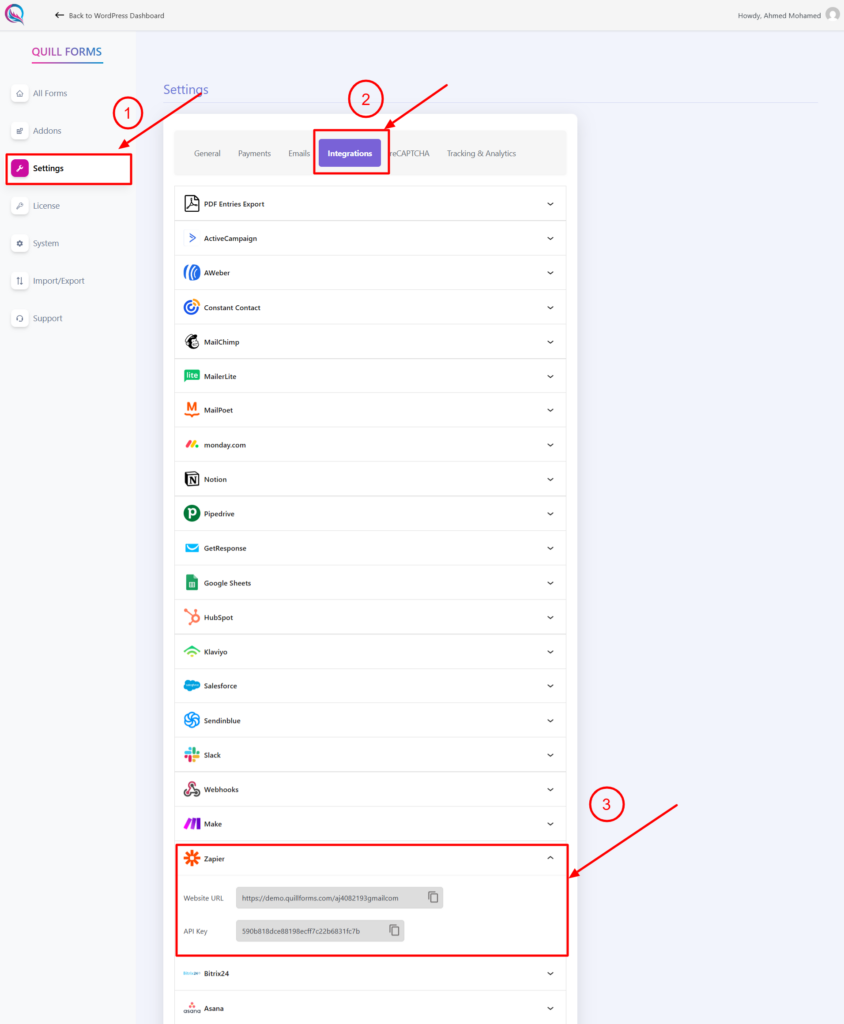
1. Go to the Settings tab in your QuillForms dashboard, then click on the Integrations tab. Locate the Zapier section (accordion) and copy your Website URL and API key—you’ll need these to connect your form to Zapier.
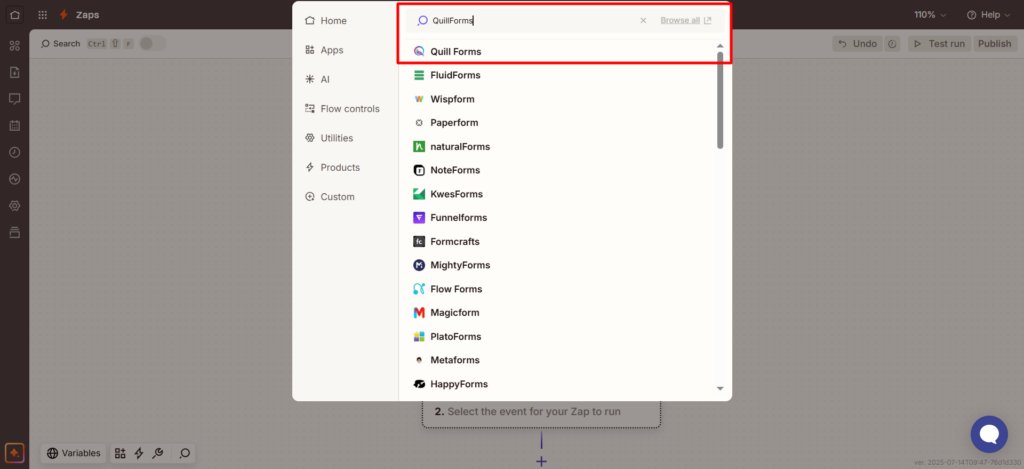
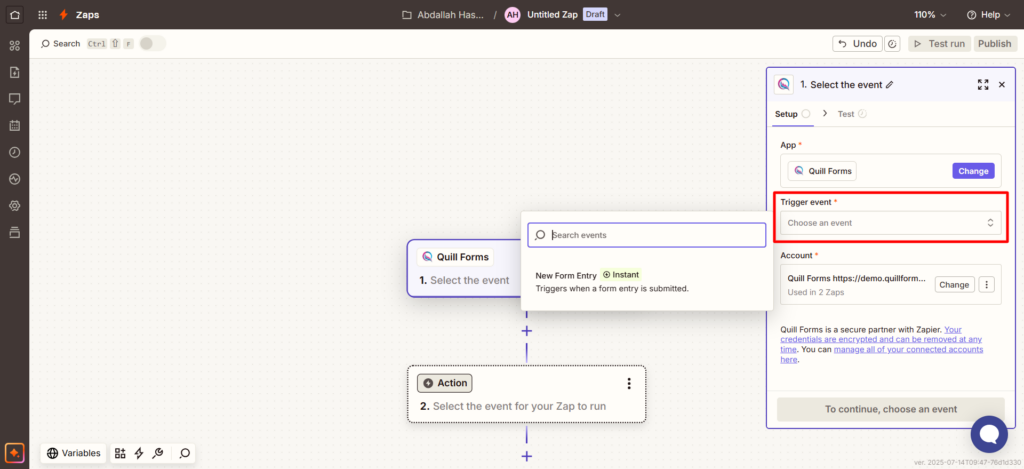
2. Then, go to this link to create a new Zap. In the Trigger section, search for and select Qull Forms as your trigger app.
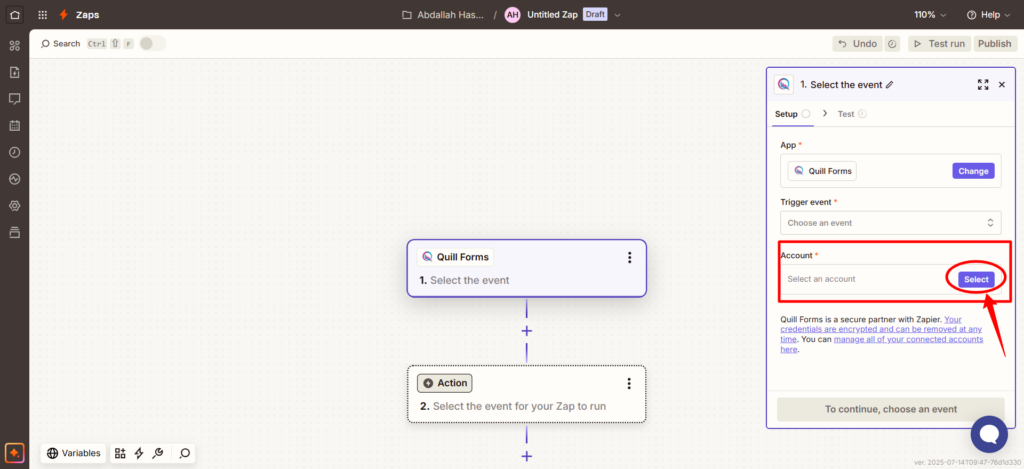
3. Next, in the Account field on the right-hand menu, click Sign In to connect your QuillForms account.
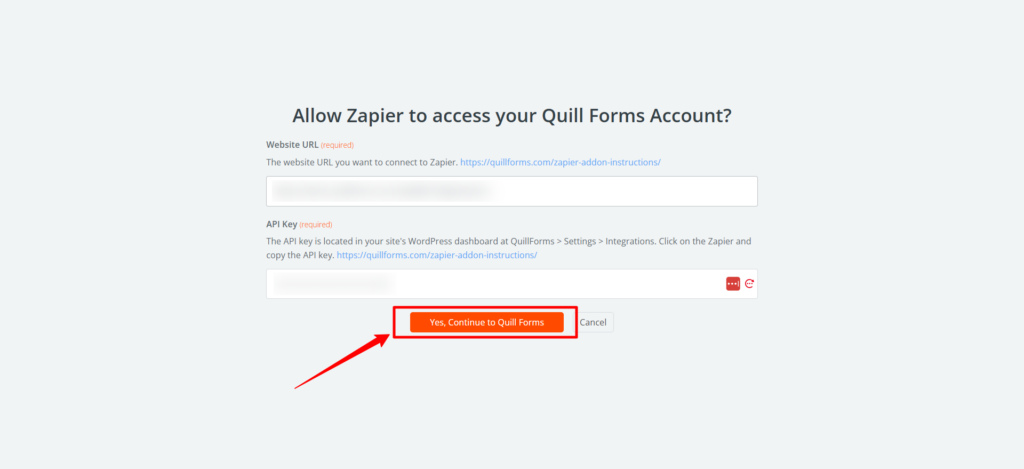
4. Then, paste the information you copied earlier into the Website URL and API Key fields, and click the “Yes, Continue” button.
5. Your QuillForms account has now been successfully connected to Zapier. Next, click on the Trigger Event dropdown menu and select the event you’d like to use—such as New Form Entry.
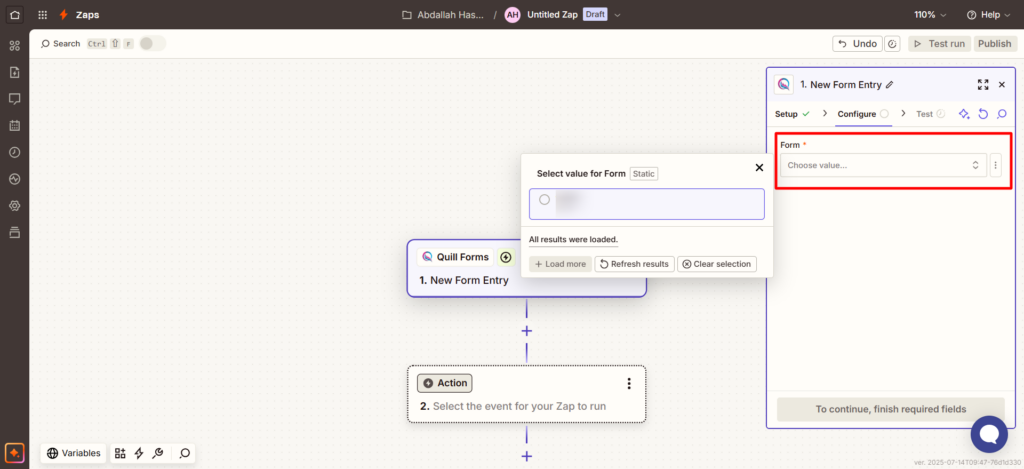
6. After that, click Continue, then choose the specific event you want to listen for by selecting it from the Form Name field.
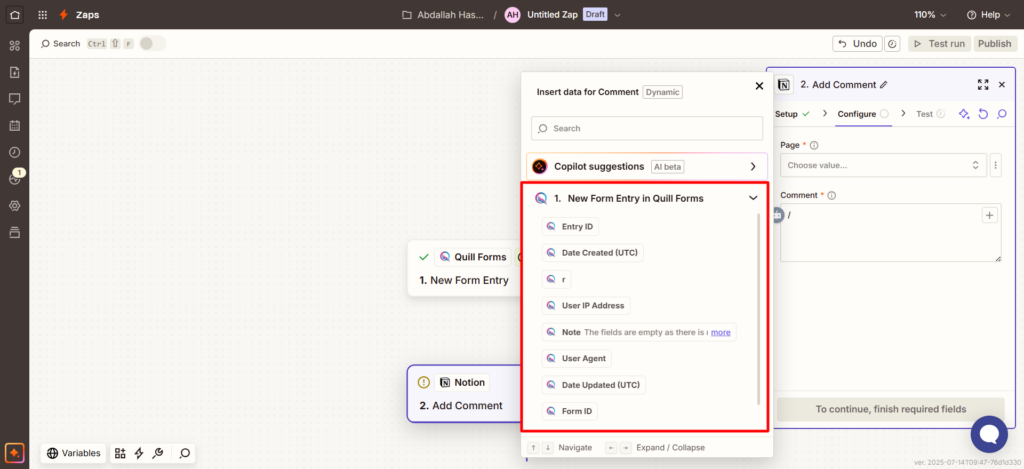
7. After this, you can choose which fields you want to use from the form data. Select the ones that are relevant to your workflow and will be used in the next action step.
Conclusion
With the QuillForms Zapier addon, you can revolutionize how your form data powers your business workflows. By seamlessly integrating QuillForms with Zapier, every form submission becomes an automated trigger — sending data exactly where it needs to go, instantly. No more manual data entry, missed follow-ups, or juggling between apps. This powerful integration helps you streamline operations, enhance team coordination, and respond faster — whether you’re managing leads, support tickets, tasks, or marketing campaigns. Automate your processes, stay organized, and boost productivity by connecting QuillForms to the tools you already use and love — all through Zapier.


