Overview
The Welcome Screen serves as the first impression of your form, providing a visually appealing and informative introduction before respondents begin filling out their responses. It is important to note that the Welcome Screen is used only once per form and appears at the very beginning. With customizable content, layout adjustments, and branding options, you can tailor the Welcome Screen to match your needs and enhance user engagement.
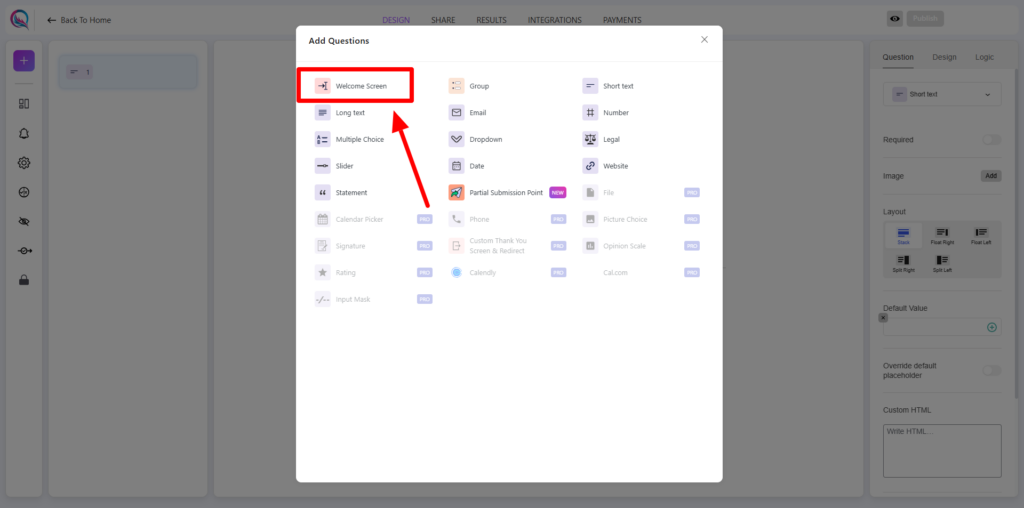
01. To begin, click on the “+” icon to add a new block to your form.

02. From the list of available options, select Welcome Screen.
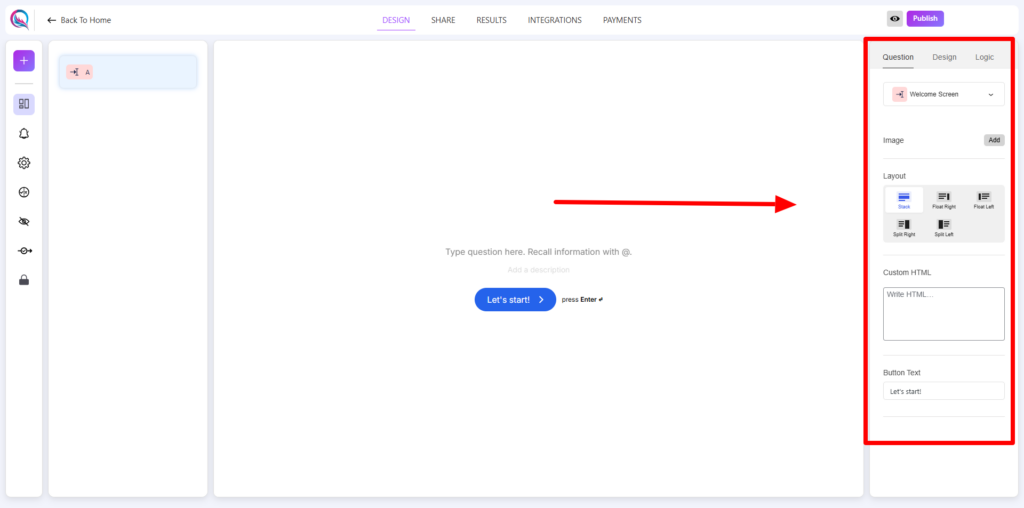
Once added, you can proceed with customizing the content, design, and logic settings to enhance the user experience.
Content Customization:
- Add Image: Enhance your welcome screen by including an image to create a visually engaging experience.
- Align Layout: Choose how content is arranged on the screen, ensuring the best readability and design aesthetics.
- Custom HTML: Insert custom HTML elements to extend functionality or add unique styling.
- Button Text: Personalize the call-to-action button with custom text to guide users seamlessly into the form.
Best Practices
- Keep the welcome message concise yet engaging to encourage participation.
- Use high-quality images or logos for a professional look.
- Customize the button text to align with the form’s purpose.
- Apply brand colors and typography for consistency.
- Utilize logic features to create a smooth and dynamic user experience.
The Welcome Screen is your opportunity to set the tone for your form—make it engaging, informative, and visually appealing!
Note: The Welcome Screen can only be used once per form


